Mastering Sage: The Art of Wall Boosts in Valorant
Valorant, Riot Games' tactical shooter, is all about strategy and creativity. Among its roster of unique agents, Sage stands out as a versatile and impactful character. Her Barrier Orb has the power to lock down sites, but when used creatively, it becomes a tool that can turn the tide of a match on both offense and defense. Today, we'll explore some of the best Sage wall boosts across various maps, helping you become a more dynamic Sage player.
Ascent - B Main (Attack)
Sage's defensive prowess is well-known, but her offensive capabilities are often underestimated.
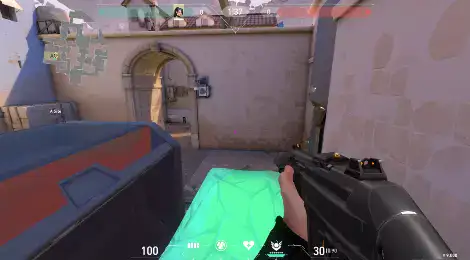
On Ascent, you can use her wall to transform her into an aggressive attacker. Position the wall atop the boxes where the orb spawns in B Main and use it as a boost. This strategic placement grants you vision through a window, offering clear sightlines into critical areas within the B Site, Market, and the Defender's Spawn.
This invaluable insight can lead to easy eliminations and game-changing plays.
Bind - B Window (Defense)
Controlling the Window on the B site in Bind is crucial for defenders. Sage's Barrier Orb is a powerful asset here, as it can prevent attackers from seizing this high-traffic entry point. Use the wall sparingly as a boost to catch enemy players off guard.
Position yourself in the center of the window ledge, look down, and jump and crouch simultaneously as you cast the wall. This maneuver grants you an off-angle for watching both Hookah and B Long.
Sunset - Bottom Mid (Attack)
The most recent map in Valorant, Sunset, provides exciting opportunities for Sage players to experiment with creative wall placements. When attacking, jump on the box at the bottom of Mid and place your wall horizontally.
This creates two unique angles. The first angle provides visibility through a window into B Main, ideal for spotting pushing defenders. The second offers a view of Top Mid, making it perfect for players using the Operator sniper rifle.
Haven - Back Site B (Defense)
On Haven, the B Site is ideal for Sage players looking for simple, yet rewarding wall boost spots. Start by going to Back Site and place your wall on the platform, standing on it while it forms.
Once boosting on this wall, you'll have the perfect angle to eliminate any enemies peeking through Mid Window. Only your head will be visible to enemies, giving you a significant advantage in any aiming duel.
Ascent - Market (Defense)
 |
On Ascent, Sage can use her Barrier Orb to create a clear line of sight into the Top of Mid, allowing her to pick off unsuspecting attackers. When defending, position yourself on the small boxes in Market and cast your wall onto the ledge in front of you. This provides control over this contested zone of the map, allowing you to spot and eliminate players positioned on Mid Top and in some areas of the courtyard. |
Bind - Showers (Defense)
Defending on Bind, Sage can place her wall within the Showers area of A Site to boost herself into a tactically advantageous position. To execute this wall, jump on the box near the entrance to Showers, then equip your Barrier Orb. Combine a well-timed jump and crouch as you deploy it, using the forming wall to boost yourself onto the top box. It's a tricky wall that requires practice, but once mastered, it will elevate your gameplay significantly.
Haven - Garage (Defense)
Securing control over the Garage area is essential for defenders on Haven. Sage's Barrier Orb can impede attackers' entry and grant her an elevated position with excellent sightlines and cover. Deploy the barrier between the Garage doors while standing on it. This placement allows you to jump onto the box behind you or use it as cover. From this vantage point, you can gain an unexpected angle on anyone approaching Mid Doors.
Split - A Rafters (Defense)
Sage's defensive role on Split can become repetitive, often involving walling off Mid every round. However, you can mix up your gameplay with more rewarding wall placements. One particular wall allows you to hold A Main from an uncommon and advantageous angle. Walk from A Heaven onto Rafters and deploy your Barrier Orb diagonally, creating a high vantage point to engage attackers as they advance through A Main.
Lotus - A Top (Defense)
On Lotus, Sage can make attacking A Site challenging for opponents by creatively employing her Barrier Orb. Start on A Top and place your wall straight in front of you to create a ledge to stand on. This boost provides you with an unpredictable off-angle that can surprise attackers entering A Site. It's exceptionally versatile and can even be used post-plant by coordinating with teammates to hold other angles that complement your position.
Haven - Heaven (Defense)
Haven offers Sage mains numerous creative wall placement options to experiment with. One demanding but rewarding choice involves ascending to A Heaven during the buy phase. Position yourself on the window ledge, look down, and cast the wall across the window with precision. Crouch and move to the right as it forms to prevent it from breaking. From this extremely high position, you can surprise attackers pushing Long and Short, securing valuable eliminations and deterring their advance.
In Valorant, Sage's Barrier Orb is a tool limited only by your creativity and strategic thinking. Master these wall boosts, adapt your approach each round, and keep the enemy guessing to become the most OP Sage player out there!

GG Boost, the Best Elo Boosting Experience!
 Deutsch
  Français
  Español
  Português